 CAD tip # 7541:
Question
However, if you need to make a quick animation of a walkthrough or fly-by in your 3D scene in a DWG file (e.g. around a house or through rooms of a flat), you can also record the interactive commands 3DWALK or 3DFLY.
First you need to add the Animation panel to your AutoCAD ribbon interface (one-time operation only):
- Switch the AutoCAD workspace to "3D Modeling" and start the CUI dialog.
- In the tree hierarchy, select the item ACAD > Ribbon > Panels > Render - Animations (the Animations panel will show up in the top right pane). Note: the ACAD tree may be hidden as a "Partial customization file".
- Reselect this item with your right mouse button and choose Copy from the context menu.
- Go up in the tree to the item ACAD > Ribbon > Tabs > Render, select it with the right mouse button and choose Paste in the context menu.
- Leave the CUI dialog with OK.

Switch to the Realistic visualization style. Use the WALKFLYSETTINGS command (or the "trampled airplane" icon in the Animations panel) to set the walkthrough parameters - step size.
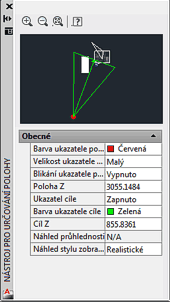
In the Animations panel, select the command Walk (3DWALK, the "footstep" icon). In the "Position locator" palette, tune up the view parameters and the initial shot. Do not terminate the Walk command.

Now click the round button "Record animation" in the Animations panel. From now on, all your interactive walk motion is recorded as a video. You can move through your scene using the mouse cursor, or with the W-A-S-D navigation keys.
By pressing the square button "Save Animation" (the same panel) you launch the dialog for the animation output file - you can set its name (Animation settings), it format (AVI, MPG, WMV, MOV), resolution and frame rate.
For older AutoCAD versions, use the Tip 5212.
![CAD Forum - tips, tricks, discussion and utilities for AutoCAD, Inventor, Revit and other Autodesk products [www.cadforum.cz] CAD Forum - tips, tricks, discussion and utilities for AutoCAD, Inventor, Revit and other Autodesk products [www.cadforum.cz]](../common/arkance_186.png)


